Introduction
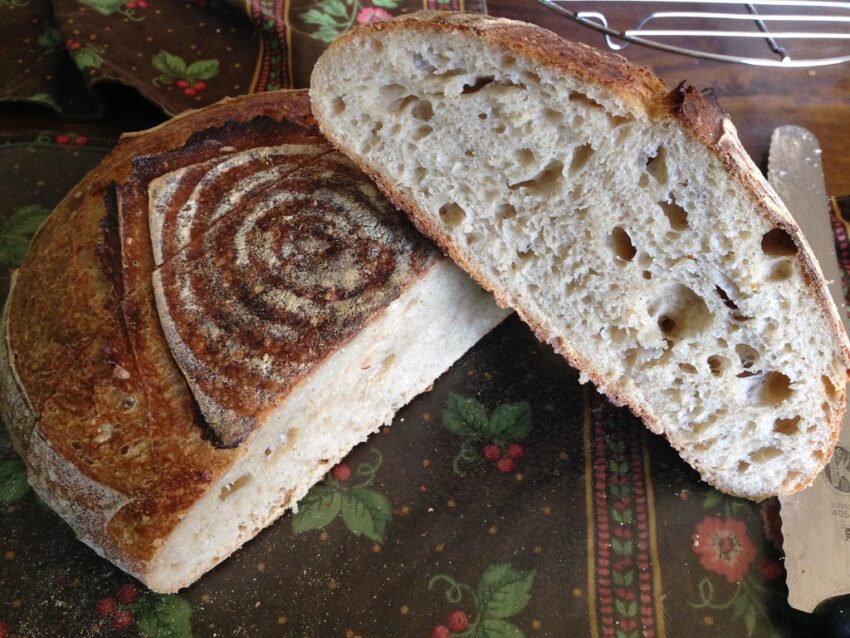
The country loaf—a rustic, hearty bread that embodies the essence of traditional baking—represents the perfect canvas for understanding bread’s fundamental principles. With just four simple ingredients—flour, water, yeast, and salt—you can create a transformative culinary experience that connects you to centuries of baking tradition.
The Science Behind the Loaf
Before diving into the recipe, understanding the role of each ingredient is crucial:
- Flour: The structural foundation, providing gluten proteins that create bread’s distinctive texture
- Water: Activates gluten, facilitates yeast growth, and helps develop dough consistency
- Yeast: Living microorganism responsible for fermentation and creating air pockets
- Salt: Enhances flavor, controls yeast growth, and strengthens gluten structure
Ingredients
For the Dough
- 500g bread flour (high-protein content)
- 350g lukewarm water
- 10g active dry yeast
- 10g sea salt
Equipment
- Large mixing bowl
- Kitchen scale
- Dutch oven or baking stone
- Proofing basket (optional)
- Sharp knife or bread lame
Step-by-Step Process
1. Mixing and Autolyse (30 minutes)
- Combine flour and 325g of water in a large bowl
- Mix until no dry flour remains
- Cover and let rest at room temperature for 30 minutes
- This allows flour to fully hydrate and gluten to begin developing
2. Adding Remaining Ingredients
- Dissolve yeast in remaining 25g of water
- Sprinkle salt over autolyse mixture
- Add yeast mixture
- Mix by hand, pinching and folding until ingredients are fully incorporated
3. Kneading (10-15 minutes)
- Perform stretch and fold technique:
- Grab one side of dough, stretch upward, then fold over center
- Rotate bowl 90 degrees
- Repeat 4-6 times
- Rest 30 minutes between kneading cycles
- Goal: Develop smooth, elastic dough with visible gluten network
4. Bulk Fermentation (2-3 hours)
- Let dough rise at room temperature (70-75°F)
- Perform 2-3 additional stretch and fold cycles during first 90 minutes
- Dough should increase in volume by 50% and show active bubbling
5. Shaping (15 minutes)
- Gently turn dough onto lightly floured surface
- Pre-shape into loose round
- Rest 15-20 minutes
- Final shaping: Create surface tension by rotating dough on counter
- Transfer to floured proofing basket or bowl
6. Final Proof (1-2 hours)
- Cover dough and let rise until nearly doubled
- Preheat oven to 475°F with Dutch oven inside
- Test readiness: Gentle poke should slowly spring back
7. Baking
- Carefully transfer dough to preheated Dutch oven
- Score top with sharp knife (creates controlled expansion point)
- Bake covered for 25 minutes
- Remove lid, bake additional 15-20 minutes until deep golden brown
- Internal temperature should reach 205-210°F
Troubleshooting
Common Issues
- Dense Loaf: Insufficient kneading or proofing
- Flat Bread: Old yeast or under-proofed dough
- Tough Crust: Oven temperature too low
Pro Tips
- Use digital scale for precision
- Room temperature significantly impacts fermentation
- Practice develops intuition
- Each loaf tells a story of its environment
Serving Suggestions
- Best enjoyed within 24 hours
- Slice with serrated knife
- Perfect with butter, olive oil, or as sandwich bread
Embrace the journey of bread making—each loaf is a delicious lesson in patience, technique, and transformation.
